Das TaSK Framework wurde am 13.06.2023 vom Bundesamt für Sicherheit in der Informationstechnik (BSI) veröffentlicht. Das Framework macht es sich zur Aufgabe TLS-Verbindungen, also Transport Layer Security, auf ihre Sicherheit zu prüfen. TLS kommt an vielerlei Stellen zum Einsatz. Sei es Webzugriffe, die über https erfolgen, E-Mail, oder weitere Web Services. Genau diese Konfigurationen, ob selbst vorgenommen oder durch Dritte bestimmt, kannst du mit dem Framework nun auf ihre Sicherheit überprüfen lassen. In dem heutigen Artikel zeige ich dir, wie du unter Ubuntu, FreeBSD und Windows
Attention: For the english version, click here!
Hier noch eine kleine Besonderheit zu diesem Artikel. Die zweireihige Serie erscheint in Kooperation mit Cyber Security Intelligence. Part 2 werde ich unten jeweils verlinken. Dort erfährst du wie man die TLS-Verbindungen letztendlich prüfen kann.
- Linux
- Linux + Docker
- FreeBSD
- FBSD + Jail
- Windows
Vorbereitungen
Zuerst solltest du dir eine Ubuntu-VM erstellen und die Netzwerkeinstellungen auf Netzwerkbrücke setzen.
Ist die Installation abgeschlossen oder nutzt eine bereits existierende Linux-Installation, solltest du, wie immer, vorher dein Repository aktualisieren.
sudo apt update && sudo apt upgrade -yIst alles sauber vorbereitet, kannst du loslegen. Zum Erstellen des Builds kannst du Apache Maven nutzen, zu installieren geht es mit folgendem Befehl:
sudo apt install mavenBei der Installation wird automatisch Java mitinstalliert. Für das TaSK Framework wird Java 17+ vorausgesetzt. Bevor du jetzt einen Fehler provozierst, tippe
java --versionein, um deine aktuelle Version von Java auszulesen:
dennis@byte-sized.de:/home/dennis# java --version openjdk 11.0.20.1 2023-08-24 OpenJDK Runtime Environment (build 11.0.20.1+1-post-Ubuntu-0ubuntu122.04) OpenJDK 64-Bit Server VM (build 11.0.20.1+1-post-Ubuntu-0ubuntu122.04, mixed mode, sharing)Bei mir war Java 11 installiert, doch benötigt wird Java 17+. Also, solltest du, falls es bei dir ähnlich aussieht eine neuere Version installieren.
sudo apt install openjdk-19-jdkMit java --version kannst du erneut überprüfen, ob die frisch installierte Version von Java nun verwendet wird.
TaSK herunterladen und Build erstellen
Als Nächstes brauchst du natürlich das TaSK-Framework. Entweder clonst du dir das Repo von Github oder lädst es dir als ZIP-Datei herunter.
Für das Clonen solltest du vorher git installiert haben:
sudo apt install gitIm Anschluss kannst du das Repository clonen:
git clone https://github.com/BSI-Bund/TaSK.gitWechsel danach entsprechend in das Verzeichnis:
cd ~/task/Nun kannst du das Build mit Maven erstellen:
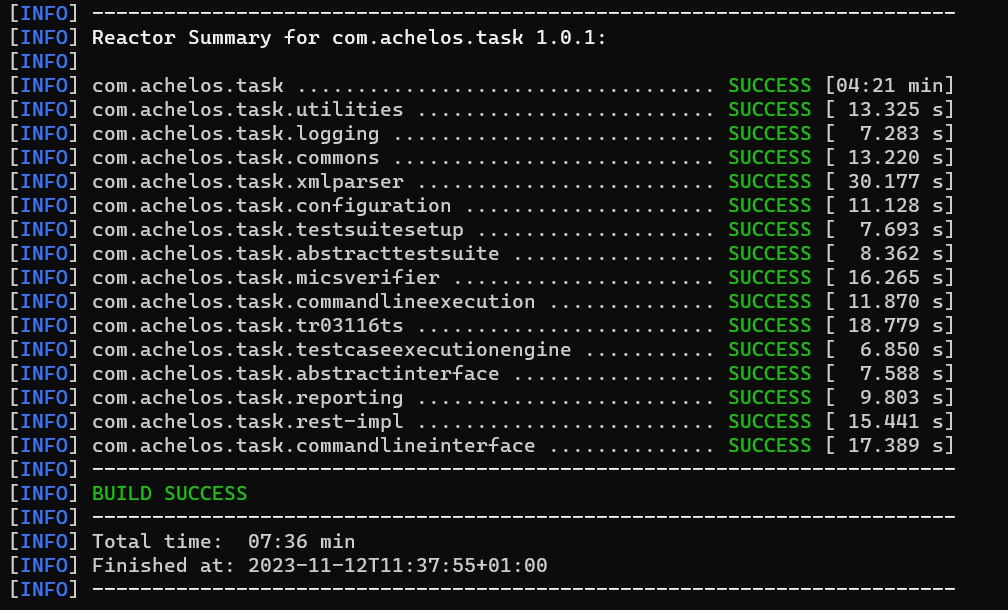
sudo mvn clean installDas kann jetzt ein bisschen Zeit in Anspruch nehmen. Nach einer Weile wirst du feststellen, dass verschiedene CVE’s von der National Vulnerability Database der jeweiligen Jahre heruntergeladen werden. Gegen diese CVE’s werden später bei der Anwendung des TaSK-Frameworks deine Konfigurationsdateien und Zertifikate getestet.
Ist das Build erfolgreich erstellt worden, solltest du diesen Output erhalten:
[INFO] ------------------------------------------------------------------------
[INFO] Reactor Summary for com.achelos.task 1.0.1:
[INFO]
[INFO] com.achelos.task …………………………….. SUCCESS [ 57.448 s]
[INFO] com.achelos.task.utilities ……………………. SUCCESS [ 10.249 s]
[INFO] com.achelos.task.logging ……………………… SUCCESS [ 7.691 s]
[INFO] com.achelos.task.commons ……………………… SUCCESS [ 15.628 s]
[INFO] com.achelos.task.xmlparser ……………………. SUCCESS [ 23.191 s]
[INFO] com.achelos.task.configuration ………………… SUCCESS [ 10.762 s]
[INFO] com.achelos.task.testsuitesetup ……………….. SUCCESS [ 7.484 s]
[INFO] com.achelos.task.abstracttestsuite …………….. SUCCESS [ 8.058 s]
[INFO] com.achelos.task.micsverifier …………………. SUCCESS [ 16.708 s]
[INFO] com.achelos.task.commandlineexecution ………….. SUCCESS [ 11.704 s]
[INFO] com.achelos.task.tr03116ts ……………………. SUCCESS [ 21.358 s]
[INFO] com.achelos.task.testcaseexecutionengine ……….. SUCCESS [ 7.168 s]
[INFO] com.achelos.task.abstractinterface …………….. SUCCESS [ 7.703 s]
[INFO] com.achelos.task.reporting ……………………. SUCCESS [ 10.129 s]
[INFO] com.achelos.task.rest-impl ……………………. SUCCESS [ 14.961 s]
[INFO] com.achelos.task.commandlineinterface ………….. SUCCESS [ 15.720 s]
[INFO] ------------------------------------------------------------------------
[INFO] BUILD SUCCESS
[INFO] ------------------------------------------------------------------------
[INFO] Total time: 04:06 min
[INFO] Finished at: 2023-11-12T19:50:15+01:00
[INFO] ------------------------------------------------------------------------
Mit Part 2 zur Anwendung des TaSK Frameworks geht es weiter auf dem Blog von Cyber Security Intelligence.
Vorbereitungen
Zuerst solltest du dir eine Ubuntu-VM erstellen und die Netzwerkeinstellungen auf Netzwerkbrücke setzen.
Ist die Installation abgeschlossen oder nutzt eine bereits existierende Linux-Installation, solltest du, wie immer, vorher dein Repository aktualisieren.
sudo apt update && sudo apt upgrade -yBeim Setup unter Einsatz von Docker ist die Installations vom TaSK-Framework noch schneller erledigt.
Zu Beginn installiere erstmal die benötigte Software:
sudo apt install docker docker-compose gitIm Anschluss clone das Repository vom TaSK-Framework oder lade die ZIP-Datei hier herunter.
git clone https://github.com/BSI-Bund/TaSK.gitWechsel mit cd in das Verzeichnis:
cd ~/task/TaSK als Docker-Container
Abschließend ist nur noch ein Befehl nötig und der Docker Container für das TaSK-Framework wird erstellt:
docker-compose up -dDas kann jetzt ein bisschen Zeit in Anspruch nehmen. Nach einer Weile wirst du feststellen, dass verschiedene CVE’s von der National Vulnerability Database der jeweiligen Jahre heruntergeladen werden. Gegen diese CVE’s werden später bei der Anwendung des TaSK-Frameworks deine Konfigurationsdateien und Zertifikate getestet.
Ist das Build erfolgreich erstellt worden, solltest du diesen Output erhalten:
[INFO] ------------------------------------------------------------------------
[INFO] Reactor Summary for com.achelos.task 1.0.1:
[INFO]
[INFO] com.achelos.task …………………………….. SUCCESS [ 57.448 s]
[INFO] com.achelos.task.utilities ……………………. SUCCESS [ 10.249 s]
[INFO] com.achelos.task.logging ……………………… SUCCESS [ 7.691 s]
[INFO] com.achelos.task.commons ……………………… SUCCESS [ 15.628 s]
[INFO] com.achelos.task.xmlparser ……………………. SUCCESS [ 23.191 s]
[INFO] com.achelos.task.configuration ………………… SUCCESS [ 10.762 s]
[INFO] com.achelos.task.testsuitesetup ……………….. SUCCESS [ 7.484 s]
[INFO] com.achelos.task.abstracttestsuite …………….. SUCCESS [ 8.058 s]
[INFO] com.achelos.task.micsverifier …………………. SUCCESS [ 16.708 s]
[INFO] com.achelos.task.commandlineexecution ………….. SUCCESS [ 11.704 s]
[INFO] com.achelos.task.tr03116ts ……………………. SUCCESS [ 21.358 s]
[INFO] com.achelos.task.testcaseexecutionengine ……….. SUCCESS [ 7.168 s]
[INFO] com.achelos.task.abstractinterface …………….. SUCCESS [ 7.703 s]
[INFO] com.achelos.task.reporting ……………………. SUCCESS [ 10.129 s]
[INFO] com.achelos.task.rest-impl ……………………. SUCCESS [ 14.961 s]
[INFO] com.achelos.task.commandlineinterface ………….. SUCCESS [ 15.720 s]
[INFO] ------------------------------------------------------------------------
[INFO] BUILD SUCCESS
[INFO] ------------------------------------------------------------------------
[INFO] Total time: 04:06 min
[INFO] Finished at: 2023-11-12T19:50:15+01:00
[INFO] ------------------------------------------------------------------------
Mit Part 2 zur Anwendung des TaSK Frameworks geht es weiter auf dem Blog von Cyber Security Intelligence.
Vorbereitungen
Zuerst solltest du dir eine FreeBSD-VM erstellen und die Netzwerkeinstellungen auf Netzwerkbrücke setzen.
Ist die Installation abgeschlossen oder nutzt eine bereits existierende FreeBSD-Installation, solltest du, wie immer, vorher dein Repository aktualisieren. Hierbei solltest du schon in den Superuser mit su wechseln:
pkg update && pkg upgrade -yIst das getan, kannst du beginnen die benötigte Software zu installieren. Mit Apache Maven, was später zum Erstellen des Builds benötigt wird, basiert auf Java. Allerdings wird hierbei Java 8 installiert, für das TaSK-Framework wird allerdings Java 17+ benötigt. Also, installiere am Besten gleich eine Version >= 17. Git wird im nächsten Schritt benötigt.
pkg install maven openjdk20 gitAls Nächstes brauchst du natürlich das TaSK-Framework. Entweder clonst du dir das Repo von Github oder lädst es dir als ZIP-Datei herunter.
git clone https://github.com/BSI-Bund/TaSK.gitDas Build erstellen
Wechsel danach entsprechend in das Verzeichnis:
cd ~/task/Nun kannst du das Build mit Maven erstellen:
sudo mvn clean installDas kann jetzt ein bisschen Zeit in Anspruch nehmen. Nach einer Weile wirst du feststellen, dass verschiedene CVE’s von der National Vulnerability Database der jeweiligen Jahre heruntergeladen werden. Gegen diese CVE’s werden später bei der Anwendung des TaSK-Frameworks deine Konfigurationsdateien und Zertifikate getestet.
[INFO] ------------------------------------------------------------------------
[INFO] Reactor Summary for com.achelos.task 1.0.1:
[INFO]
[INFO] com.achelos.task …………………………….. SUCCESS [ 57.448 s]
[INFO] com.achelos.task.utilities ……………………. SUCCESS [ 10.249 s]
[INFO] com.achelos.task.logging ……………………… SUCCESS [ 7.691 s]
[INFO] com.achelos.task.commons ……………………… SUCCESS [ 15.628 s]
[INFO] com.achelos.task.xmlparser ……………………. SUCCESS [ 23.191 s]
[INFO] com.achelos.task.configuration ………………… SUCCESS [ 10.762 s]
[INFO] com.achelos.task.testsuitesetup ……………….. SUCCESS [ 7.484 s]
[INFO] com.achelos.task.abstracttestsuite …………….. SUCCESS [ 8.058 s]
[INFO] com.achelos.task.micsverifier …………………. SUCCESS [ 16.708 s]
[INFO] com.achelos.task.commandlineexecution ………….. SUCCESS [ 11.704 s]
[INFO] com.achelos.task.tr03116ts ……………………. SUCCESS [ 21.358 s]
[INFO] com.achelos.task.testcaseexecutionengine ……….. SUCCESS [ 7.168 s]
[INFO] com.achelos.task.abstractinterface …………….. SUCCESS [ 7.703 s]
[INFO] com.achelos.task.reporting ……………………. SUCCESS [ 10.129 s]
[INFO] com.achelos.task.rest-impl ……………………. SUCCESS [ 14.961 s]
[INFO] com.achelos.task.commandlineinterface ………….. SUCCESS [ 15.720 s]
[INFO] ------------------------------------------------------------------------
[INFO] BUILD SUCCESS
[INFO] ------------------------------------------------------------------------
[INFO] Total time: 04:06 min
[INFO] Finished at: 2023-11-12T19:50:15+01:00
[INFO] ------------------------------------------------------------------------
Mit Part 2 zur Anwendung des TaSK Frameworks geht es weiter auf dem Blog von Cyber Security Intelligence.
Vorbereitungen
Zuerst solltest du dir eine FreeBSD-VM erstellen und die Netzwerkeinstellungen auf Netzwerkbrücke setzen.
Ist die Installation abgeschlossen oder nutzt eine bereits existierende FreeBSD-Installation, solltest du, wie immer, vorher dein Repository aktualisieren. Hierbei solltest du in den Superuser mit su wechseln:
pkg update && pkg upgrade -yIst das getan, installiere pot als Jail Manager. Einen Artikel dazu findest du hier.
Jail vorbereiten
Für das TaSK-Framework als Jail habe ich ein Flavour erstellt. Ein Flavour ist eigentlich nichts anderes als ein Template, welches man beliebig oft anwenden kann, um Jails zu erstellen.
Wechsel dazu in den Ordner /usr/local/etc/pot/flavours und erstelle eine Datei namens task.sh – Der Dateiname kann hier freigewählt werden.
root@byte-sized:/usr/local/etc/pot/flavours # vi task.sh
pkg update && pkg upgrade -y

pkg install maven openjdk20 git

git clone https://github.com/BSI-Bund/TaSK

cd TaSK/task

mvn clean install
Dieses Skript bzw. Flavour wird als Erstes das Repository und die Software upgraden. Danach wird die benötigte Software installiert, von GitHub das TaSK-Framework heruntergeladen und abschließend auch schon direkt installiert.
Jail für TaSK erstellen
Als letzten Schritt erstellst du die Jail basierend auf dem Flavour. Dabei wird die Jail namens task erstellst, mit FreeBSD 13.2 als base system, die Netzwerkeinstellung ist auf Netzwerkbrücke gesetzt und der Pfad zum Flavour ist mit angegeben.
pot create -p task -b 13.2 -t single -N public-bridge -f /usr/local/etc/pot/flavours/task.shNun wird im ersten Schritt die Jail und im Anschluss gleich ein Build vom TaSK Framework erstellt.
Das kann jetzt ein bisschen Zeit in Anspruch nehmen. Nach einer Weile wirst du feststellen, dass verschiedene CVE’s von der National Vulnerability Database der jeweiligen Jahre heruntergeladen werden. Gegen diese CVE’s werden später bei der Anwendung des TaSK Frameworks deine Konfigurationsdateien und Zertifikate getestet.
Ist das Build erfolgreich erstellen worden, solltest du diesen Output erhalten:
[INFO] ------------------------------------------------------------------------
[INFO] Reactor Summary for com.achelos.task 1.0.1:
[INFO]
[INFO] com.achelos.task …………………………….. SUCCESS [ 57.448 s]
[INFO] com.achelos.task.utilities ……………………. SUCCESS [ 10.249 s]
[INFO] com.achelos.task.logging ……………………… SUCCESS [ 7.691 s]
[INFO] com.achelos.task.commons ……………………… SUCCESS [ 15.628 s]
[INFO] com.achelos.task.xmlparser ……………………. SUCCESS [ 23.191 s]
[INFO] com.achelos.task.configuration ………………… SUCCESS [ 10.762 s]
[INFO] com.achelos.task.testsuitesetup ……………….. SUCCESS [ 7.484 s]
[INFO] com.achelos.task.abstracttestsuite …………….. SUCCESS [ 8.058 s]
[INFO] com.achelos.task.micsverifier …………………. SUCCESS [ 16.708 s]
[INFO] com.achelos.task.commandlineexecution ………….. SUCCESS [ 11.704 s]
[INFO] com.achelos.task.tr03116ts ……………………. SUCCESS [ 21.358 s]
[INFO] com.achelos.task.testcaseexecutionengine ……….. SUCCESS [ 7.168 s]
[INFO] com.achelos.task.abstractinterface …………….. SUCCESS [ 7.703 s]
[INFO] com.achelos.task.reporting ……………………. SUCCESS [ 10.129 s]
[INFO] com.achelos.task.rest-impl ……………………. SUCCESS [ 14.961 s]
[INFO] com.achelos.task.commandlineinterface ………….. SUCCESS [ 15.720 s]
[INFO] ------------------------------------------------------------------------
[INFO] BUILD SUCCESS
[INFO] ------------------------------------------------------------------------
[INFO] Total time: 04:06 min
[INFO] Finished at: 2023-11-12T19:50:15+01:00
[INFO] ------------------------------------------------------------------------
Von dieser Jail kannst du jetzt ein Snapshot erstellen und jederzeit, wenn gewünscht importieren oder exportieren.
Mit Part 2 zur Anwendung des TaSK Frameworks geht es weiter auf dem Blog von Cyber Security Intelligence.
Vorbereitungen
Zur Installation unter Windows kannst du entweder eine verfügbare Windows-Installation nutzen oder du erstellst dir eine VM und setzt die Netzwerkeinstellungen wahlweise auf Netzwerkbrücke.
- Lade dir Java JDK 21 hier herunter und installiere es
- Als nächsten Schritt lade Apache Maven hier herunter und entpacke die ZIP-Datei, an einen Ort deiner Wahl
- Zum Schluss lade noch das TaSK-Tool hier herunter und entpacke auch die ZIP-Datei, an einen Ort deiner Wahl
Für das Erstellen des Builds sollten keine Umgebungsvariablen nötig sein. Um jedoch den korrekten Zugriff auf Maven zu prüfen, tippe folgenden Befehl ein:
mvn --versionDer Output sollte ungefähr diesem entsprechen:
C:\Users\byte-sized>mvn --version
Apache Maven 3.9.5 (57804ffe001d7215b5e7bcb531cf83df38f93546)
Maven home: C:\Users\byte-sized\Downloads\apache-maven-3.9.5-bin\apache-maven-3.9.5
Java version: 21.0.1, vendor: Oracle Corporation, runtime: C:\Program Files\Java\jdk-21
Default locale: de_DE, platform encoding: UTF-8
OS name: "windows 11", version: "10.0", arch: "amd64", family: "windows"
Wichtig ist, dass eine Java Version aufgeführt ist die mindestens den Anforderungen von Version 17 entspricht.
Das Build erstellen
Immernoch in der CMD, wechsel nun in den entpackten Ordner des TaSK Frameworks
cd C:\Users\byte-sized\Downloads\TaSK-master\taskZum Erstellen des Build führe folgenden Befehl aus:
mvn clean installIst das Build erfolgreich erstellt worden, solltest du diesen Output erhalten:
[INFO] ------------------------------------------------------------------------
[INFO] Reactor Summary for com.achelos.task 1.0.1:
[INFO]
[INFO] com.achelos.task …………………………….. SUCCESS [ 57.448 s]
[INFO] com.achelos.task.utilities ……………………. SUCCESS [ 10.249 s]
[INFO] com.achelos.task.logging ……………………… SUCCESS [ 7.691 s]
[INFO] com.achelos.task.commons ……………………… SUCCESS [ 15.628 s]
[INFO] com.achelos.task.xmlparser ……………………. SUCCESS [ 23.191 s]
[INFO] com.achelos.task.configuration ………………… SUCCESS [ 10.762 s]
[INFO] com.achelos.task.testsuitesetup ……………….. SUCCESS [ 7.484 s]
[INFO] com.achelos.task.abstracttestsuite …………….. SUCCESS [ 8.058 s]
[INFO] com.achelos.task.micsverifier …………………. SUCCESS [ 16.708 s]
[INFO] com.achelos.task.commandlineexecution ………….. SUCCESS [ 11.704 s]
[INFO] com.achelos.task.tr03116ts ……………………. SUCCESS [ 21.358 s]
[INFO] com.achelos.task.testcaseexecutionengine ……….. SUCCESS [ 7.168 s]
[INFO] com.achelos.task.abstractinterface …………….. SUCCESS [ 7.703 s]
[INFO] com.achelos.task.reporting ……………………. SUCCESS [ 10.129 s]
[INFO] com.achelos.task.rest-impl ……………………. SUCCESS [ 14.961 s]
[INFO] com.achelos.task.commandlineinterface ………….. SUCCESS [ 15.720 s]
[INFO] ------------------------------------------------------------------------
[INFO] BUILD SUCCESS
[INFO] ------------------------------------------------------------------------
[INFO] Total time: 04:06 min
[INFO] Finished at: 2023-11-12T19:50:15+01:00
[INFO] ------------------------------------------------------------------------
Mit Part 2 zur Anwendung des TaSK Frameworks geht es weiter auf dem Blog von Cyber Security Intelligence.
Install TaSK Framework of the BSI – Part 1
The TaSK Framework was released on June 13, 2023, by the Federal Office for Information Security (BSI). The framework’s purpose is to assess the security of Transport Layer Security (TLS) connections. TLS is utilized in various contexts, including web access through HTTPS, email, and other web services. Whether these configurations are self-made or determined by third parties, the framework allows you to examine their security. In today’s article, I’ll show you how to do this on Ubuntu, FreeBSD, and Windows.
Here’s a special note about this article: This two-part series is presented in collaboration with Cyber Security Intelligence. I will provide the link to Part 2 below, where you can learn how to ultimately assess TLS connections.
- Linux
- Linux + Docker
- FreeBSD
- FBSD + Jail
- Windows
Preparations
First, you should create an Ubuntu VM and set the network settings to a network bridge.
Once the installation is complete or if you are using an existing Linux installation, as always, update your repository first:
sudo apt update && sudo apt upgrade -yOnce everything is set up, you can get started. To build the TaSK Framework, you can use Apache Maven. Install it with the following command:
sudo apt install mavenDuring the installation, Java will be automatically installed. TaSK Framework requires Java 17+. Before potentially causing an error, type the following command to check your current Java version:
java --versionIn my case, Java 11 was installed, but Java 17+ is required. So, if your situation is similar, install a newer version:
sudo apt install openjdk-19-jdkUse java --version to verify that the newly installed version of Java is now in use.
Download TaSK and Build
Next, you need the TaSK Framework. Either clone the repository from Github or download it as a ZIP file.
If you choose to clone, make sure you have Git installed:
sudo apt install gitThen, clone the repository:
git clone https://github.com/BSI-Bund/TaSK.gitAfter that, navigate to the directory:
cd ~/task/Now you can build it with Maven:
sudo mvn clean installThis may take some time. After a while, you will notice that various CVEs from the National Vulnerability Database of the respective years are being downloaded. These CVEs will later be tested against your configuration files and certificates when applying the TaSK Framework.
If the build is successful, you should see the following output:
[INFO] ------------------------------------------------------------------------
[INFO] Reactor Summary for com.achelos.task 1.0.1:
[INFO]
[INFO] com.achelos.task …………………………….. SUCCESS [ 57.448 s]
[INFO] com.achelos.task.utilities ……………………. SUCCESS [ 10.249 s]
...
[INFO] com.achelos.task.commandlineinterface ………….. SUCCESS [ 15.720 s]
[INFO] ------------------------------------------------------------------------
[INFO] BUILD SUCCESS
[INFO] ------------------------------------------------------------------------
[INFO] Total time: 04:06 min
[INFO] Finished at: 2023-11-12T19:50:15+01:00
[INFO] ------------------------------------------------------------------------
Continue with Part 2 for the application of the TaSK Framework on the Cyber Security Intelligence blog.
Preparations
First, create an Ubuntu VM and set the network settings to a network bridge.
Once the installation is complete or if you are using an existing Linux installation, as always, update your repository first:
sudo apt update && sudo apt upgrade -yIf you’re using Docker for the setup, the installation of the TaSK Framework is even faster.
To begin, install the required software:
sudo apt install docker docker-compose gitNext, clone the TaSK Framework repository or download the ZIP file here.
git clone https://github.com/BSI-Bund/TaSK.gitNavigate to the directory:
cd ~/task/TaSK as Docker Container
Finally, only one command is needed to create the Docker container for the TaSK Framework:
docker-compose up -dThis may take some time. After a while, you will notice that various CVEs from the National Vulnerability Database of the respective years are being downloaded. These CVEs will later be tested against your configuration files and certificates when applying the TaSK Framework.
If the build is successful, you should see the following output:
[INFO] ------------------------------------------------------------------------
[INFO] Reactor Summary for com.achelos.task 1.0.1:
[INFO]
[INFO] com.achelos.task …………………………….. SUCCESS [ 57.448 s]
[INFO] com.achelos.task.utilities ……………………. SUCCESS [ 10.249 s]
…
[INFO] com.achelos.task.commandlineinterface ………….. SUCCESS [ 15.720 s]
[INFO] ------------------------------------------------------------------------
[INFO] BUILD SUCCESS
[INFO] ------------------------------------------------------------------------
[INFO] Total time: 04:06 min
[INFO] Finished at: 2023-11-12T19:50:15+01:00
[INFO] ------------------------------------------------------------------------
Continue with Part 2 for the application of the TaSK Framework on the Cyber Security Intelligence blog.
Preparations
First, create a FreeBSD VM and set the network settings to a network bridge.
Once the installation is complete or if you are using an existing FreeBSD installation, as always, update your repository. You should switch to the superuser with su:
pkg update && pkg upgrade -yOnce done, you can begin installing the required software. Apache Maven, which will be needed later to build, is based on Java. However, Java 8 is installed by default, and the TaSK Framework requires Java 17+. So, it’s best to install a version >= 17. Git is needed in the next step.
pkg install maven openjdk20 gitNext, you need the TaSK Framework. Either clone the repository from Github or download it as a ZIP file.
git clone https://github.com/BSI-Bund/TaSK.gitBuild Process
After that, navigate to the directory:
cd ~/task/Now you can build it with Maven:
sudo mvn clean installThis may take some time. After a while, you will notice that various CVEs from the National Vulnerability Database of the respective years are being downloaded. These CVEs will later be tested against your configuration files and certificates when applying the TaSK Framework.
If the build is successful, you should see the following output:
[INFO] ------------------------------------------------------------------------
[INFO] Reactor Summary for com.achelos.task 1.0.1:
[INFO]
[INFO] com.achelos.task …………………………….. SUCCESS [ 57.448 s]
[INFO] com.achelos.task.utilities ……………………. SUCCESS [ 10.249 s]
…
[INFO] com.achelos.task.commandlineinterface ………….. SUCCESS [ 15.720 s]
[INFO] ------------------------------------------------------------------------
[INFO] BUILD SUCCESS
[INFO] ------------------------------------------------------------------------
[INFO] Total time: 04:06 min
[INFO] Finished at: 2023-11-12T19:50:15+01:00
[INFO] ------------------------------------------------------------------------
Continue with Part 2 for the application of the TaSK Framework on the Cyber Security Intelligence blog.
Preparations
First, create a FreeBSD VM and set the network settings to a network bridge.
Once the installation is complete or if you are using an existing FreeBSD installation, as always, update your repository. Switch to the superuser with su:
pkg update && pkg upgrade -yOnce done, install pot as a Jail Manager. You can find an article about it here.
Prepare Jail
For the TaSK Framework as a Jail, I’ve created a Flavour. A Flavour is essentially a template that can be applied as many times as needed to create Jails.
Navigate to the folder /usr/local/etc/pot/flavours and create a file named task.sh. The filename can be chosen freely.
root@byte-sized:/usr/local/etc/pot/flavours # vi task.sh
pkg update && pkg upgrade -y

pkg install maven openjdk20 git

git clone https://github.com/BSI-Bund/TaSK

cd TaSK/task

mvn clean install
This script or Flavour will first upgrade the repository and software. After that, it installs the required software, downloads the TaSK Framework from GitHub, and finally installs it.
Create Jail for TaSK
As the last step, create the Jail based on the Flavour. This will create a Jail named ‚task,‘ with FreeBSD 13.2 as the base system, the network setting is on a network bridge, and the path to the Flavour is specified.
pot create -p task -b 13.2 -t single -N public-bridge -f /usr/local/etc/pot/flavours/task.shIn the first step, the Jail is created, and subsequently, a build of the TaSK Framework is performed.
This may take some time. After a while, you will notice that various CVEs from the National Vulnerability Database of the respective years are being downloaded. These CVEs will later be tested against your configuration files and certificates when applying the TaSK Framework.
If the build is successful, you should see the following output:
[INFO] ------------------------------------------------------------------------
[INFO] Reactor Summary for com.achelos.task 1.0.1:
[INFO]
[INFO] com.achelos.task …………………………….. SUCCESS [ 57.448 s]
[INFO] com.achelos.task.utilities ……………………. SUCCESS [ 10.249 s]
…
[INFO] com.achelos.task.commandlineinterface ………….. SUCCESS [ 15.720 s]
[INFO] ------------------------------------------------------------------------
[INFO] BUILD SUCCESS
[INFO] ------------------------------------------------------------------------
[INFO] Total time: 04:06 min
[INFO] Finished at: 2023-11-12T19:50:15+01:00
[INFO] ------------------------------------------------------------------------
You can now create a snapshot of this Jail and import or export it anytime as desired.
Continue with Part 2 for the application of the TaSK Framework on the Cyber Security Intelligence blog.
Preparations
For the installation on Windows, you can either use an existing Windows installation or create a VM and set the network settings to a network bridge.
- Download Java JDK 21 from here and install it.
- Next, download Apache Maven from here and extract the ZIP file to a location of your choice.
- Finally, download the TaSK tool from here and also extract the ZIP file to a location of your choice.
For building the TaSK Framework, no environment variables should be necessary. However, to verify the correct access to Maven, type the following command:
mvn --versionThe output should be similar to this:
C:\Users\byte-sized>mvn --version
Apache Maven 3.9.5 (57804ffe001d7215b5e7bcb531cf83df38f93546)
Maven home: C:\Users\byte-sized\Downloads\apache-maven-3.9.5-bin\apache-maven-3.9.5
Java version: 21.0.1, vendor: Oracle Corporation, runtime: C:\Program Files\Java\jdk-21
Default locale: de_DE, platform encoding: UTF-8
OS name: "windows 11", version: "10.0", arch: "amd64", family: "windows"
It is essential that a Java version is listed that is at least compatible with the requirements of version 17.
Build Process
Still in the CMD, navigate to the extracted folder of the TaSK Framework:
cd C:\Users\byte-sized\Downloads\TaSK-master\taskTo build the TaSK Framework, execute the following command:
mvn clean installIf the build is successful, you should see the following output:
[INFO] ------------------------------------------------------------------------
[INFO] Reactor Summary for com.achelos.task 1.0.1:
[INFO]
[INFO] com.achelos.task …………………………….. SUCCESS [ 57.448 s]
[INFO] com.achelos.task.utilities ……………………. SUCCESS [ 10.249 s]
…
[INFO] com.achelos.task.commandlineinterface ………….. SUCCESS [ 15.720 s]
[INFO] ------------------------------------------------------------------------
[INFO] BUILD SUCCESS
[INFO] ------------------------------------------------------------------------
[INFO] Total time: 04:06 min
[INFO] Finished at: 2023-11-12T19:50:15+01:00
[INFO] ------------------------------------------------------------------------
Continue with Part 2 for the application of the TaSK Framework on the Cyber Security Intelligence blog.
Join the discussion
2 replies to “TaSK Framework des BSI installieren – Part 1”
I just like the valuable info you provide to your articles. I will bookmark your weblog and take a look at once more right here frequently. I am moderately certain I’ll be informed lots of new stuff right here! Best of luck for the next!
I simply couldn’t go away your website prior to suggesting that I extremely enjoyed the standard info a person provide on your visitors? Is going to be back often to check out new posts