
PlayOnLinux ist eine leistungsstarke Anwendung, die es Linux-Benutzern ermöglicht, Windows-Anwendungen auf ihrem System auszuführen. Attention: For the english version click here! Dies ist besonders nützlich, wenn bestimmte für Windows entwickelte Anwendungen auf Linux-Systemen nicht verfügbar sind. Eine Möglichkeit, Windows-Anwendungen unter Ubuntu zu installieren, besteht darin, ein ISO-Image zu mounten und die darin enthaltene Software mit PlayOnLinux zu installieren. In diesem Artikel gehen wir Schritt für Schritt vor, bis unsere ISO erfolgreich installiert haben. Also, fangen wir an!
ISO mounten
Zuerst müssen wir das ISO-Image herunterladen oder anderweitig auf dem Computer verfügbar machen, das wir später mounten und installieren wollen.
Als nächstes müssen wir einen Ordner erstellen, in dem wir das ISO-Image mounten können. Dazu öffnen wir das Terminal und geben den folgenden Befehl ein:
mkdir ~/mountpointDies erstellt einen Ordner namens „mountpoint“ im Home-Verzeichnis des Benutzers. Der Name kann hierbei natürlich beliebig gewählt werden.
Als Nächstes müssen wir das ISO-Image in den soeben erstellten Ordner mounten:
sudo mount -o loop Pfad/zur/ISO-Datei ~/mountpointErsetze „Pfad/zur/ISO-Datei“ durch den tatsächlichen Pfad zur heruntergeladenen ISO-Datei. Dieser Befehl mountet das ISO-Image in das Verzeichnis „mountpoint“.
PlayOnLinux installieren
Bevor wir nun PlayOnLinux installieren, sollten wir vorher wieder das Repository aktualiseren. In meinem Falle wäre das:
sudo apt updateIst der Prozess durchgelaufen, können wir gleich mit der Installation weitermachen:
sudo apt install playonlinuxJetzt sind alle nötigen Vorbereitungen getroffen, um das ISO-Image auf eurem Linux-System zu installieren.
ISO-Image mit PlayOnLinux installieren
Starten könnt ihr PlayOnLinux über die grafische Oberfläche oder über das Terminal mit der Eingabe „playonlinux“.
1. Ist das Programm gestartet, klickt auf „Install“ und es öffnet sich folgendes Fenster:
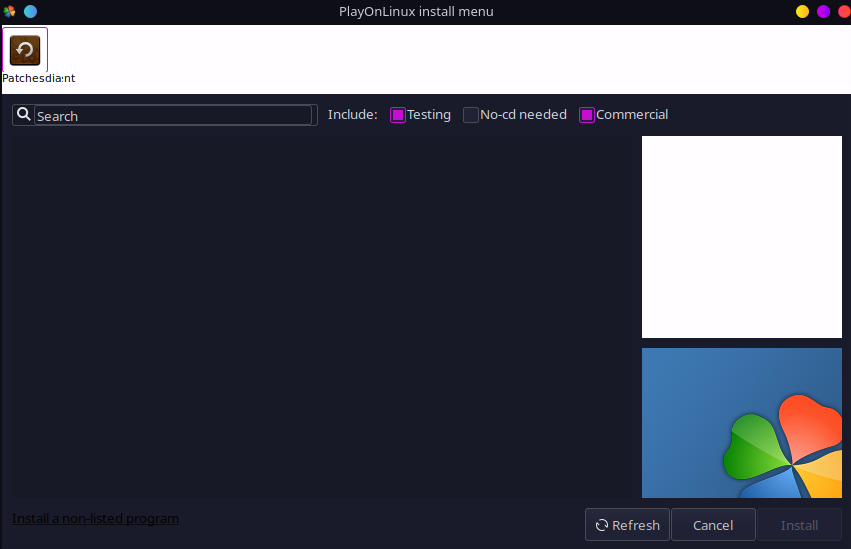
2. Nun geht weiter über die Option „Install a non-listed program“ unten links in der Ecke (siehe Abbildung).
3. Jetzt klickt solange „Next“ bis folgendes Fenster erscheint:
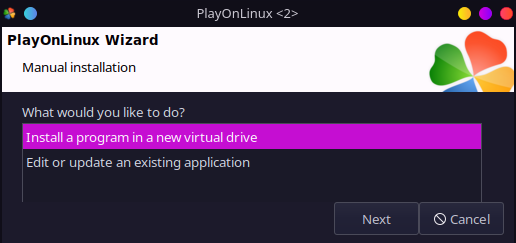
4. Wählt hier, wie auf der Abbildung zu erkennen ist, die Option „Install a program in a new virtual drive“ und bestätigt mit „Next“.
5. Danach öffnet sich ein Fenster, in dem ein Name für das neue virtuellle Laufwerk vergeben werden kann. Bestätigt das Ganze wieder mit „Next“.
6. Nachfolgenden lassen sich noch verschiedene Wine-Optionen definieren, sofern diese benötigt werden. In meinen Fällen konnte ich das bisher immer überspringen „Next“.
7. Im Anschluss liegt es an euch, ob ihr eine 32bit- oder 64bit-Applikation installieren wollt. Wählt entsprechend aus und geht über zum nächsten Schritt „Next“.
8. Nun wird das virtuelle Laufwerk mit eurem vergebenen Namen erstellt. Danach könnt ihr das zu installierende ISO auswählen. Öffnet die Schaltfläche „Browse“ und wählt den zuvor erstellten Ordner „mountpoint“ aus.
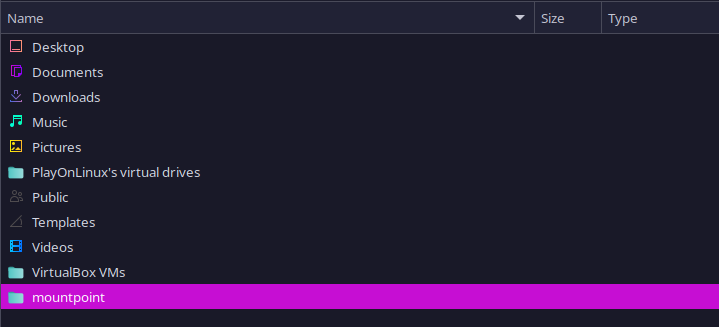
9. In diesem Ordner ist eure gemountete ISO enthalten. Unter all den Dateien und Ordnern, solltet ihr auch eine .exe-Datei finden, um das Programm final zu installieren. Öffnet diese und folgt dem Installationsprozess.
Ist dieser abgeschlossen habt ihr erfolgreich ein ISO-Image gemountet und mittels PlayOnLinux auf eurem Computer installiert. Wer mehr über PlayOnLinux erfahren möchte, dem kann ich das Wiki empfehlen. Viel Spaß!
PlayOnLinux – Mounting and Installing ISO Images
PlayOnLinux is a powerful application that allows Linux users to run Windows applications on their system. This is particularly useful when certain applications developed for Windows are not available on Linux systems. One way to install Windows applications on Ubuntu is to mount an ISO image and install the software contained within using PlayOnLinux. In this article, we will take you through the steps to successfully install an ISO image. So let’s get started!
Mounting the ISO
First, we need to download or otherwise make available the ISO image that we want to mount and install later.
Next, we need to create a folder in which we can mount the ISO image. To do this, open the terminal and enter the following command:
mkdir ~/mountpointThis creates a folder named „mountpoint“ in the user’s home directory. The name can, of course, be chosen arbitrarily.
Next, we need to mount the ISO image in the folder we just created:
sudo mount -o loop path/to/iso/file ~/mountpointReplace „path/to/iso/file“ with the actual path to the downloaded ISO file. This command mounts the ISO image into the „mountpoint“ directory.
Installing PlayOnLinux
Before installing PlayOnLinux, we should update the repository again. In my case, this would be:
sudo apt updateOnce the process has completed, we can proceed with the installation:
sudo apt install playonlinuxNow, all the necessary preparations are done to install the ISO image on your Linux system.
Installing the ISO Image with PlayOnLinux
You can start PlayOnLinux via the graphical interface or the terminal by entering „playonlinux“.
1. Once the program has started, click on „Install“ and the following window will open:
2. Continue by selecting the option „Install a non-listed program“ located at the bottom left corner (see image).
3. Next, click „Next“ repeatedly until the following window appears:
4. As shown in the image, select the option „Install a program in a new virtual drive“ and confirm with „Next“.
5. Next, a window will appear where you can give a name to the new virtual drive. Confirm this by clicking „Next“ again.
6. You can define various Wine options in the following window, if needed. In my cases, I have always been able to skip this step by clicking „Next“.
7. After that, you can choose whether you want to install a 32-bit or 64-bit application. Make your selection and proceed to the next step by clicking „Next“.
8. Now the virtual drive with the name you provided will be created. After that, you can select the ISO you want to install. Click the „Browse“ button and select the previously created directory „mountpoint“ .
9. In this folder, you will find your mounted ISO, including the .exe file that you need to open and follow the installation process to complete the installation.
Once this process is finished, you have successfully mounted an ISO image and installed it on your computer using PlayOnLinux. If you want to read more about PlayOnLinux, I can recommend you their Wiki. Enjoy!
Start the discussion